Short Field Take-Offs and Landings
The weather the past four days have been really crappy for flying. At one point on Sunday it was gusting up to 35KTs!
That said, I was still able to get two flights in plus a ground briefing. A solo flight on Friday morning and a dual today.
Friday’s flight was great. The weather was perfect. Light winds and mainly sunny. I love flying at 8am in the mornings. This was also the first time I flew this particular plane. I was able to get 1 circuit in before it started to get busy. Seneca college students all lined up on Bravo to take off on runway 33. I was number 5 behind them. I wish I had taken a photo of the line-up.
The good thing about this flight is that it was consistent. My landings were pretty much all the same. Next time I go, I’m going to try to see if I can bring the touchdown point a little closer to the threshold of the runway.

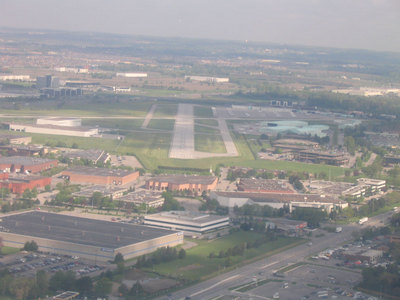
Final for Runway 33
Because the weather was no good on Saturday, my FI and I did a ground briefing for some new techniques for landing and take off. We talked about Short and Long Field take offs and landings.
A short field take-off would be used when your runway is shorter than you’d like it to be. What you want to do is get up to speed for climbing as quickly as possible (ie in the less amount of runway as possible). In order to do that you would use “ground effect” to your advantage. Think of ground effect as a “cushion of air” that is lifting your plane off the ground. It is caused by wing tip vorticies that curl under your wing and strike the ground. This allows the airplane to become airborne earlier than normal. You then stay in this configuration (flying along the runway at about 10-20′ AGL) until your airspeed reaches your climb-out speed (which is 78KIAS in the 172). To help you with using the least amount of runway as possible, you position the plane at the threshold. With the brakes applied you bring the engine up to full power, then let go of the brakes and boom! off you go.
A short field landing is a little different than a normal landing because you want to use the least amount of distance as possible. This involves using 40° of flaps. What a huge difference this makes in your forward visibility. The more flaps you use the more nose down the aircraft is. This is good because you can see more in front of you. You also use 40° of flaps so that you can be even slower (and use less runway) by the time you hit the runway. The approach speed is only 60KIAS instead of 65KIAS with a normal landing. The idea here is to land as close to the threshold as possible. Once you touchdown, pull back on the control column, flaps up (bringing the flaps up puts more weight on the main wheels to help you slow down), and max breaking. When we practice we do everything except for the hard braking… just to save the brakes.
So today we practiced both short field take offs and landings. The approach is a lot different with 40° of flaps. You have to keep in mind that your power will be higher because of the added drag the flaps create. You can really feel the plane slow down when you go from 20° to 40°. I can, however, see why people enjoy using 40° of flaps on landing.. you really do see a lot more! At first I was getting the feeling that we were dive bombing into the runway. It’s just an illusion because your attitude is a lot more nose down than on a “normal” landing. Because of such, you have to pull back a lot more on the control column in the flair to get into that cruise attitude. I can’t wait to practice this solo tomorrow.
I’m also designing my own performance worksheet and weight and balance worksheet. My FI has suggested that I start working on doing one for each flight. I think it’s a good idea! That way come final exam time, I’m so used to doing it that it will be second nature. I’ll post more information about these worksheets when I get them done.
I’ve been going through the “Flight Test Notes” book that I bought a while ago last night. This book is excellent as it outlines some of the questions the TC Examiner might ask you on your final exam. There are two questions that stumped me for a few days. I was able to get the answer for one on my own, but had to ask my FI the other one:
1. How can you control pitch if the elevator cables were severed?
2. Why are the ailerons and the flaps corrugated?
I’m curious, what are your answers to those questions?
Hey Blake,
Do you have the ISBN number of the book “Flight Test Notes”? Probably a good book to look at to prepare for the examiner. Is it something that is put out by Transport Canada?
Cheers
Mark
Vancouver,BC
WOW… that picture is absoultly amazing, soo pretty… im proud of you man good luck in all of your flying accomplishment, maybe one day you will take me flying with you….
Hey Mark,
Here are the details:
“Flight Test Notes. Preparation guide for Canadian Private and Commercial Flight Tests”
By Andrew Fasan
Published by Aviation Publishers Co. Ltd.
http://www.aviationpublishers.com
ISBN: 0-9680390-7-3
Blake
Did you find the answer to the “corrugated” question? I’m a student pilot at Vancouver, and this corrugated stuff intrigues me. The best I could come up with is a co-relation with the standard corrugated boxes. The corrugation gives boxes structural rigidity and end-to-end strength along the “flutes” (go to wikipedia and search for “corrugated box”). This same concept applied to the ailerons would make sense. If you get another answer, please do share with me.
And great website.
Cheers
Mayur
Forgot my comment for the pitch control in case of a severed elevator cable. I don’t know which aircraft you fly, but the Emergency Procedures in a Cessna 152 POH has a section “Landing without Elevator control”, which explains the landing.
Cheers
Mayur